
How to Read Putting Greens in Golf Using Drainage As a Clue
A 20-foot putt can look almost straight from behind the ball, yet drift low of the hole because the wider green was tilting away all along. When golfers focus on the cup and start line first, that broader clue is easy to miss.
One useful way to read putting greens in golf is to begin with the landscape. By considering where rainwater would leave the green, a golfer can identify its likely low side and general drainage direction before judging the individual putt. That does not provide a complete line, but it gives the rest of the green reading process a more informed starting point.
Why Should You Use Drainage to Read a Green Before You Read the Putt?
Drainage is useful because it points to the green’s broad low side before attention narrows to the ball and hole. Every putting green has to shed excess water, so its overall shape will usually encourage water towards a lower edge, runoff area or surrounding low ground. That dominant direction can also indicate the general direction in which gravity is likely to influence a rolling ball.
This landscape-first approach helps explain a putt in context. Rather than seeing only the line of a putt from behind the ball, a golfer can first establish the green’s general tilt, then consider whether the putt travels with it, against it or across it. Drainage is not a shortcut to a guaranteed read: local undulation, green speed, maintenance and contours around the hole can all alter the path. It is simply the first clue, not the final answer.
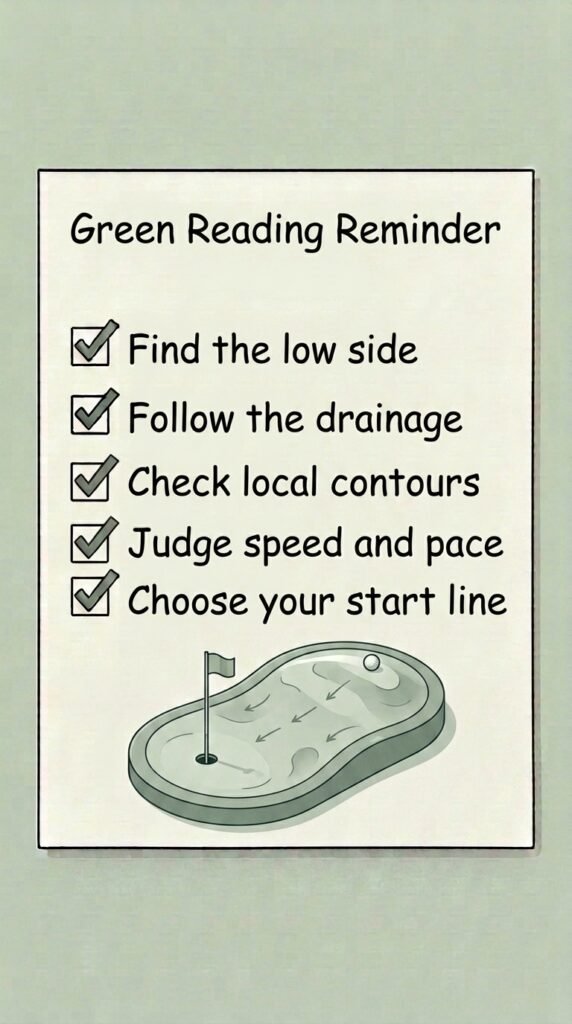
Save This Pre-Round Checklist
Before you head to the first tee, take a few seconds to run through this simple checklist. It’s designed to remind you of the key points from this blog post that can help you avoid unnecessary mistakes and score more consistently throughout your round.
How Can You Find the Low Side and Drainage Direction of a Putting Green?
The low side is usually found by asking where water would naturally leave the green after rain, then looking beyond the hole for supporting clues. The aim is to build a picture of the whole green complex rather than rely on one feature.
– Study the overall shape of the putting surface: From a distance, look for the higher shoulder and the edge that appears to sit lower. A green may contain several small slopes, but it often has one broad drainage direction.
– Look for a collection area: A hollow or closely mown area beside the green often receives balls and water from the surface. Its position can reveal a likely low side.
– Notice runoff and fall-away ground: An edge that drops into short grass, rough or a hollow is a useful clue. Water is more likely to move towards a fall-away than towards a raised bank.
– Compare bunker floor elevation: A bunker that visibly sits below the putting surface may support the idea that this side of the green is lower, although the bunker alone does not prove the entire green drains that way.
– Use the surrounding fairway and terrain: Lower fairway ground, a dip beside the green or a downhill approach can show the larger landscape into which the green drains.
– Match the clues rather than chasing one perfect sign: A lower bunker, a runoff area and falling ground on the same side form a stronger picture than any one clue in isolation.
Is Your Putt Moving With, Against or Across the Green’s Drainage Slope?
A putt can be compared with the drainage slope by imagining the general direction water would take from the green and then mapping the ball-to-hole route against it. This gives a broad classification before the smaller contours are assessed.
A putt travelling generally towards the low side is likely to be downhill relative to the dominant tilt. One travelling away from it is more likely to be uphill. Neither category is automatically straight; local contour may still move the ball to one side.
A putt travelling across the drainage direction is the key case. If a green broadly falls from left to right and the putt runs across it, gravity has more opportunity to pull the ball towards the low side during its journey. It will often show more side break than a putt moving more directly uphill or downhill on the same general slope.
For example, an apparently straight 20-foot putt may be travelling across a green that falls away on its left edge. Once that wider tilt is recognised, the putt is no longer simply straight-looking; it is a cross-slope putt whose path may move towards the lower side.
How do You Separate the Overall Drainage Read From Local Contours Around the Hole?
The drainage read describes the green’s overall tilt, while local contours determine how the ball may behave at particular points on its route. Both parts of the read matter. A broad slope towards one side can coexist with a ridge near the hole, a shelf around a tucked pin or a subtle transition zone that briefly sends the ball another way.
Walking to the predicted low side is a practical way to test the first impression. From there, the hole may appear above the golfer’s feet and the general tilt may be easier to see. If the view does not support the original drainage picture, or exposes a contour that was hidden from behind the ball, the initial read can be adjusted before a line is chosen.
The final inspection can focus on the route rather than the cup alone:
– Near the ball: check whether the first few feet are influenced by a small crown, depression or change in slope.
– Along the middle: look for ridges, shelves and subtle bends that may alter the path of the ball.
– Around the hole: identify sharper breaks, tiers or a change of tilt that could affect the final roll.
Drainage provides the background direction. The local contour tells the more detailed story of the individual putt.
How do Green Speed and Pace Change the Amount of Break and Your Start Line?
Green speed and intended pace affect how much time slope has to influence the ball, so they belong in the final read rather than being treated separately from it. On a faster putting surface, or with a softer delivery, the ball rolls for longer at a speed where a cross-slope can move it towards the low side. A firmer pace may reduce the visible break, but it does not remove the slope or make a poor read irrelevant.
Only after considering the broad drainage direction and local contours does a target point become meaningful. A golfer might weigh the severity of the slope, how much of the putt travels across it, any ridge or shelf near the hole, and the pace required to reach the cup. The chosen start line is then an attempt to match all of those observations, rather than a guess made from behind the ball alone.
Surface details can refine that decision, particularly on shorter putts. Grain direction, moisture content, recent aeration, mowing and small imperfections may affect how freely the ball rolls. These are usually secondary to the obvious shape of the green, but they can help explain why a putt behaves slightly differently from the broad drainage read.
How Can You Read the Greens Efficiently and Improve Your Drainage Reads During a Round?
One way golfers often build an efficient drainage read is to incorporate it into normal movement around the green, then checked over several putts during the round on the golf course. It need not involve a lengthy inspection of every putting surface.
– Observe the green on the approach: As the green comes into view, notice its high and low edges, surrounding terrain and any obvious runoff or collection area. This gives an early landscape-first impression.
– Confirm clues while walking to the ball: A lower bunker, fall-away edge or low fairway ground may be clearer from another angle. Normal walking often provides enough information to refine the likely drainage direction.
– Classify the putt before looking closely at the line: Consider whether it is generally uphill, downhill or crossing the dominant tilt. This frames the likely influence of gravity.
– Use the low-side view when practical: While tending the flag, walking around another player’s line or moving into position, a glance from the predicted low side can test whether the tilt and hole position support the read.
– Finish with the familiar behind-the-ball view: This remains useful for seeing the immediate line, local contour and intended start point. It is simply more informative once the overall green has been read first.
– Use results as feedback, not proof: A successful putt or a miss can show whether the ball moved as the drainage picture suggested. Over several putts, that feedback may improve green-reading abilities on the course. One putt, however, can be affected by pace, contact or a small contour, so it rarely justifies a major correction on its own.
Conclusion
The useful shift is to read the green before reading the hole. Finding where water is likely to leave the surface can reveal a broad low side, helping golfers place each putt within the green’s overall slope. From there, local contours, pace and the final start line can be assessed with a clearer picture of what the ball may do.
This article and video are intended as general golf strategy education and commentary for a broad audience. They are not personalised golf instruction or coaching, and readers should decide for themselves whether and how these ideas apply to their own game.