
The Easiest Way to Lower Your Golf Score
A round can unravel quickly after one tee shot finds trouble, one ambitious recovery catches a branch, or one long putt races well past the hole. For many mid- and high-handicap golfers, those costly sequences do more damage to a golf score than a missed birdie chance ever could.
The easiest way to lower golf score is often not chasing a perfect golf swing. It is recognising the shots where a normal miss can become a penalty, a repeated recovery or a three-putt, then choosing an option that keeps the next shot manageable. These situations below show where course management can turn potential doubles and triples into more survivable bogeys.
Why Is Managing Your Normal Miss the Easiest Way to Lower Your Golf Score?
Managing a normal miss is the easiest way to lower your golf score because imperfect shots are part of golf, while the cost of those shots is often shaped by the decision made before them.
A poor swing may still leave a golfer in the fairway, on the safe side of the green or with a straightforward chip. The same swing, aimed at a narrow target beside out of bounds or water, may lead to a penalty stroke. The difference is not always ball striking; it is whether the club, target and route allowed room for the likely ball flight.
This is why big numbers often come from two decisions rather than one bad shot. A tee shot finds the tree line, then an ambitious gap is attempted. An approach misses a tucked pin, then a difficult chip is played towards a tiny landing zone. A long putt finishes six feet past, then the return putt is treated as a test rather than a routine finish.
Normal-miss management means planning for the shot that commonly appears, not the best shot a golfer might produce. Before any stroke, a useful question is: where can my usual miss finish without ruining the next shot? That question does not remove mistakes, but it can keep them playable and make lower scores more realistic without changing a swing.
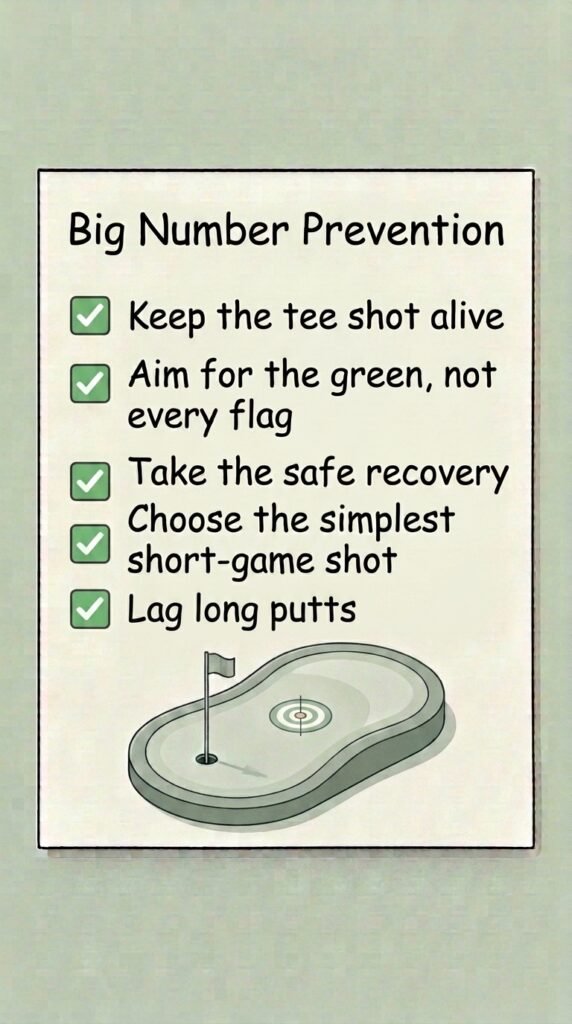
Big Number Prevention Checklist
Before you head to the first tee, take a few seconds to run through this simple checklist. It’s designed to remind you of the key information from this blog that can help avoid unnecessary mistakes and score more consistently throughout your round.
How Should You Choose a Tee Shot That Keeps the Next Shot Alive?
A tee shot keeps the next shot alive when its likely miss stays in play and leaves a reasonable route towards the green.
Driver is not automatically the wrong choice. On a wide hole with trouble well outside a golfer’s usual shot dispersion, its extra distance may make the approach easier. The calculation changes when out of bounds runs down the slice side, water begins where a common miss lands, or a driver miss brings trees and a blocked-out lie into play. In those cases, a fairway wood, hybrid or iron may produce a less impressive tee shot but a more useful next stroke.
One common way to assess the tee box is to consider three things:
– The usual ball flight: A golfer who frequently fades or slices the ball may find right-side trouble more relevant than the full width of the hole suggests. A draw pattern changes the risk to the opposite side.
– The trouble at the expected landing distance: Hazards should be judged against realistic carry distance and total distance, rather than the occasional longest drive. A forced carry that is comfortable with one club may be marginal with another.
– The likely second shot: The aim is not simply to find fairways. A shorter club is useful when it leaves a clear, ordinary approach shot; it is less useful if it creates an awkward lay-up or leaves trouble in the same place.
The tee-shot rule is simple: keep the next shot alive. On a narrow par 4, that may mean accepting more distance into the green in exchange for avoiding a reload, penalty area or recovery from the trees. It is a course-management choice, not a judgement on whether a golfer is capable of using driver.
Why Should You Aim for the Green Instead of Attacking Every Flag?
Golfers should aim for the green rather than attack every flag when the cost of a normal miss near the flag is much greater than the benefit of finishing close.
A tucked pin can make the flag look like the natural target, particularly from a comfortable iron distance. Yet a 150-yard approach to a flag beside water may demand a precise carry, start line and strike. If the centre of the green offers room away from the penalty area, it is often the more sensible target. A longer putt from the green is usually preferable to replaying from a drop zone or trying to save par from a difficult position.
Green-over-flag targeting does not mean aiming blindly at the middle on every approach. It means treating the whole green as the scoring target and favouring the portion that protects against the common miss. When bunkers, water or steep slopes guard one side, the safe side of the green may be the sensible place to aim.
A golfer might consider:
– Where a short, long or offline approach finishes: Trouble beyond the green can matter as much as the hazard in front of it.
– How much green is available: A centre-of-green target offers more usable space than a tucked pin near an edge.
– What the miss leaves next: Missing on the safe side may leave a chip or putt; missing on the guarded side may leave a penalty or become short-sided.
This approach accepts that an amateur golfer’s shot dispersion is wider than a flagstick. It reduces the pressure to manufacture a perfect approach shot and keeps a normal miss from becoming an expensive one.
When Is a Punch-Out or Wedge Shot a Smart Recovery Instead of a Hero Shot?
A punch-out or wedge shot is a smart recovery when it restores a normal next shot; it becomes a hero shot when success relies on an unusually precise strike, route or result.
From the trees, seeing the green through a gap can be tempting. A roughly four-foot window may appear open, but if the ball must start perfectly, stay below branches and avoid clipping either side, the shot is not a genuine punch-out. It is an attempt to recover everything at once. A sideways or backward punch-out that returns the ball to the fairway may leave a longer approach, but it also ends the chain of difficult decisions.
The recovery-shot test is straightforward:
– A true recovery has margin: There is enough space for an ordinary strike, and the ball can return to a playable area even if it is not hit perfectly.
– A hero shot requires several things to go right: A narrow window, a clean lie, a low flight and exact contact may all be required to reach the green.
– The next shot reveals the value of the choice: If a punch-out leaves a normal approach from the fairway, it has done its job. If an attempted escape can easily leave the ball deeper in the tree line, the risk is likely disproportionate to the reward.
The same principle applies from 50 to 100 yards. These partial wedge shots can feel like automatic birdie opportunities, but thin, heavy and long strikes remain possible. Selecting a wedge by a best-ever carry distance and aiming directly at a tucked pin leaves little room for any of them.
Repeatable-distance wedge planning is usually calmer. A golfer may choose a carry number they can produce consistently, then select a landing zone with margin around it. If the flag is near a bunker or the front edge, a centre-of-green target may be more useful than trying to force a close look. Scoring range does not guarantee birdie; it is simply a place where sensible targets can prevent a small miss becoming a larger problem.
How Can a Simpler Short Game Save Shots Around the Green and From Bunkers?
A simpler short game saves shots by prioritising a safe landing area and a clean exit from trouble before trying to finish close to the hole.
Around the green and from a greenside bunker, the most attractive shot is not always the one with the highest chance of leaving a straightforward putt. Two practical rules can keep the emphasis on the next playable stroke.
– Start with the largest safe landing area: When a green is missed, the hole is not necessarily the first target. A golfer can first look for the broadest area where the ball can land and run without bringing another bunker, slope or penalty area into play. This can reduce the chance of a failed chip shot that requires another attempt.
– Use a bump-and-run where the route permits: If there is clear green between the ball and the hole, a lower-running shot may ask less of the strike than a high flop over a bunker. It may not finish nearest the pin, but it can leave the ball in a manageable area. A delicate pitch to a tucked pin is more reasonable when the simple route is unavailable, not merely because it looks more impressive.
– Adjust expectations for the lie: Thick grass, bare ground or an awkward stance can make precise short-game contact less reliable. In those situations, the target may sensibly become the green or a safe putting surface rather than a tiny spot beside the flag.
– Make exiting the bunker the first objective: A greenside bunker shot should first clear the bunker lip by the widest, easiest available route. When the flag is 20 feet away, trying to control the distance too carefully can lead to easing the swing and leaving the ball in the sand.
– Accept the safest route, even if it is not towards the flag: Sometimes the easiest bunker exit is towards the broadest part of the green, or even sideways. Once the ball is out, a golfer has a putt and a chance to limit the damage. Remaining in the bunker is usually what turns an ordinary bogey opportunity into double bogey or worse.
How Do You Avoid Three-Putts by Improving Long-Putt Distance Control?
Three-putts are reduced when the first long putt is treated as a distance-control shot to a finishing area, rather than as a must-make attempt.
From long range, the hole remains the reference point, but it need not be the only target. The practical objective is to finish the first putt close enough that the second putt feels routine. On a 40-foot putt, finishing around three feet away can be a successful outcome, even if the first putt never seriously threatened the cup.
The three-putt pattern often starts with an unrealistic expectation. A golfer sees a possible birdie and sends the putt six feet past. The return putt then carries more pressure and may be missed. In that sense, the extra stroke is not always caused by one poor putting stroke; it can begin with a first-putt target that gave no margin for pace.
A finishing-area approach encourages attention to speed, slope and the area around the hole where a second putt remains manageable. It also makes lag putting less about avoiding embarrassment and more about accepting the sensible result: a controlled first putt followed by a routine finish.
Conclusion
The easiest way to lower your golf scores is often to make ordinary mistakes cheaper. A safer tee club, a centre-of-green target, a genuine punch-out or a conservative short-game option may not create the highlight shot, but each can keep a difficult hole from escalating. Before every shot, considering the worst likely outcome and the choice that keeps it out of play can lead to more repeatable decisions across every round.
This article and video are intended as general golf strategy education and commentary for a broad audience. They are not personalised golf instruction or coaching, and readers should decide for themselves whether and how these ideas apply to their own game.